Grade 5/6 Fall Art Show Project
I found this idea on Pinterest and was immediately intrigued. It was something that was really quite easy, fun and turned out so well. The students were really proud of their work. It was also an interesting process for them to evaluate each other's work and explain their reasons for it.I was so impressed with the whole project and will definitely be repeating this one!

Lesson 1: Still-life Art Sketches
Materials: White paper, pencil
I opened this lesson by displaying a still-life by Cezanne followed by discussion of still-life's. I brought in real pumpkins of varying sizes and shapes (2 per group of 4) and had the students sketch using criteria.
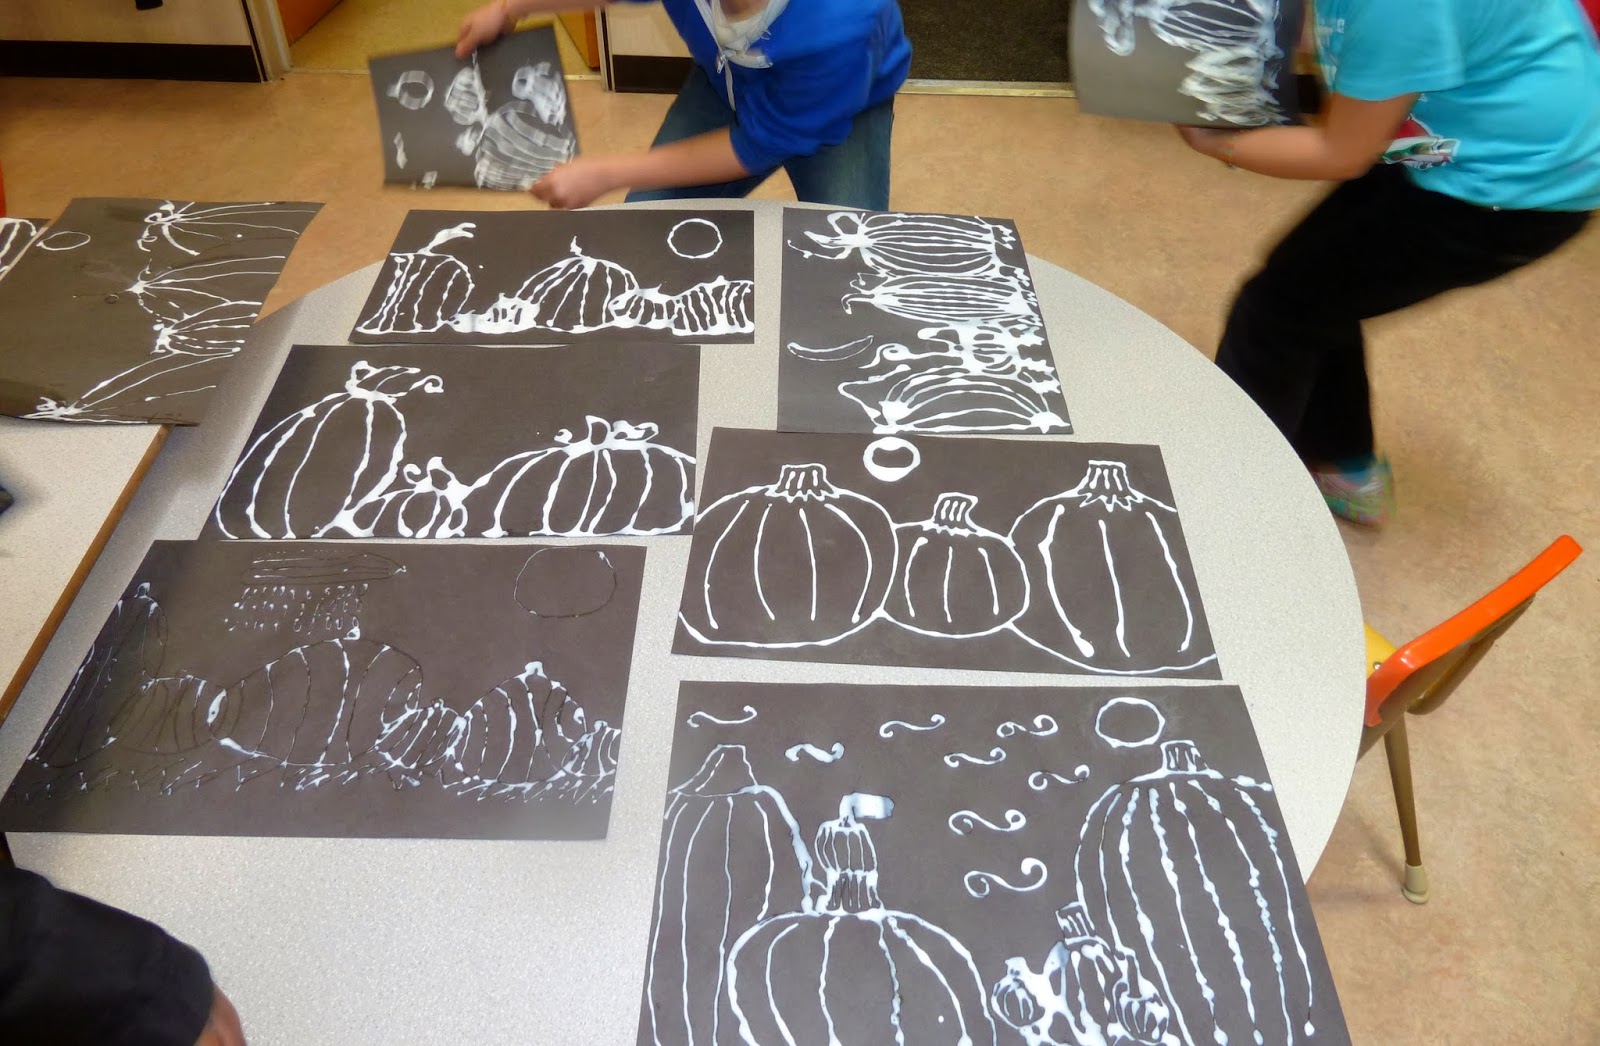
Lesson 2: Glue Lines
Materials: Black contraction paper and white glue bottles
In this lesson I introduced the project using SMARTBoard slides and went over the criteria again. The criteria included at least 3 pumpkins of varying sizes and shapes, overlapping to create illusion of depth, use of curved lines and blended colours using pastels. Groups that were listening best during instructions were allowed to pick out their pumpkins and collect supplies first. Students drew their designs first in pencil then traced with glue.
*Need a lot of flat (safe) space for drying overnight.

Lesson 3: Chalk Pastel Blending
Materials: Dried glue line pumpkin art from previous day and chalk (soft) pastels.
I started this lesson with a quick YouTube video on chalk pastel blending.

Lesson 4: Mini-Art Show and Peer Evaluation
Materials: Ballots, pencil
Before this lesson, I laminated the students' work, numbered it randomly with sticky notes and displayed it in the classroom. Students were given ballots with space to record their favourite pieces (not including their own) and why they preferred each piece. The criteria was posted for them to refer to.


The students choices were well thought out and very close to the ones I would've chosen. As I said before, this was a great project enjoyed by all.


Thank you for posting all these fantastic pictures and the lesson plans to go with them!! I really loved the selection that you brought to the art show...I was planning to ask you more about this project but you have so wonderfully provided the information :) And the laminating gave the art such a pretty effect. I didn't even realize it was done with chalk pastels!!
ReplyDeleteI really like how you used criteria in your lessons and for peer evaluation and feedback, well done! I'd like to do more of this in my teaching future. Thanks again for sharing Cheyenne!
This is fantastic, Cheyenne. I was blown away by your students art at the art show and I had been thinking that it would be something I'd like to do in the future. So thank you so much for sharing this information with us all. I must say, you seem to be a very helpful and considerate person! I really appreciate all you've done to help myself and others in the cohort.
ReplyDeleteAwesome! Thank you Cheyenne! I was also curious about this art project, so thanks for telling us how it's done. I am definitely going to be using this in my classroom in the future. I am surprised at how simple it is compared to how complicated I had imagined it to be in my mind. I can imagine other things you could use this process with too, instead of pumpkins doing trees or a winter scene or something.
ReplyDeleteI loved this project - it turned out so well. I love projects that you go through multiple steps so that you really set the students up for success. What a great method!
ReplyDeleteThank you all for your comments and you are more than welcome for the lesson details. I loved the art show projects at the art show. It was so interesting to see all of our different ideas and approaches. I think sharing is key amongst teachers so that students are getting the best of us. My CT used to always say "work smarter, not harder". It's a whole lot easier if we are working together.
ReplyDeleteThis is an example of a high quality lesson sequence - with your permission, I would like to use it as an example next year, when I plan to give students more examples of linked lessons before they go to practicum. The strengths are the way you've woven inspiration and learning from the "real" art world with skill development, i.e. overlapping and creativity. Then, there are the added benefits of the smartboard use and involving kids with assessment. Wow! The process was powerful...as was the product.
ReplyDelete